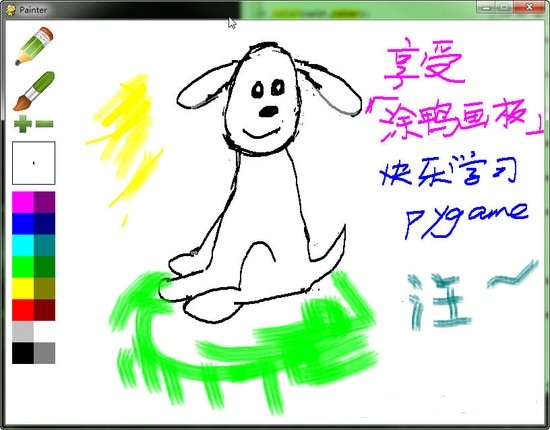
从这次开始,我会由简单到困难(其实也不会困难到哪里去)讲几个例程,每一个例程都是我自己写(或者修改,那样的话我会提供原始出处)的,都具有一定的操作性和娱乐性。例程中汇尽量覆盖到以前所讲的pygame中方方面面,如果看到哪一步不明白,那就再回去复习复习,基本没有人会看一遍什么都记住什么都掌握的,重复是学习之母,实践是掌握一门技艺的最好手段!
这次就先从一个最简单的程序开始,说实话有些太简单我都不好意思拿出手了,不过从简单的开始,容易建立自信培养兴趣。兴趣是学习之母嘛。我们这次做一个画板,类似windows里自带的画板,还记不记得第一次接触电脑用画板时的惊叹?现在想起来其实那个真的非常简陋,不过我们的比那个还要朴素,因为打算一篇讲完,就不追加很多功能了,等你把这一次讲解的都理解了,很容易可以自己给它增加新的机能。没准,你就开发出一个非常牛x的画图工具击败了photoshop,然后日进斗金名垂千古(众:喂,别做梦了!)……
功能样式
做之前总要有个数,我们的程序做出来会是个什么样子。所谓从顶到底或者从底到顶啥的,咱就不研究了,这个小程序随你怎么弄了,而且我们主要是来熟悉pygame,高级的软件设计方法一概不谈~
因为是抄袭画图板,也就是鼠标按住了能在上面涂涂画画就是了,选区、放大镜、滴管功能啥的就统统不要了。画笔的话,基本的铅笔画笔总是要的,也可以考虑加一个刷子画笔,这样有一点变化;然后颜色应该是要的,否则太过单调了,不过调色板啥的就暂时免了,提供几个候选色就好了;然后橡皮……橡皮不就是白色的画笔么?免了免了!还有啥?似乎够了。。。 ok,开始吧!
框架
pygame程序的框架都是差不多的,考虑到我们这个程序的实际作用,大概建立这样的一个代码架子就可以了。
import pygame
from pygame.locals import *
class brush():
def __init__(self):
pass
class painter():
def __init__(self):
self.screen = pygame.display.set_mode((800, 600))
pygame.display.set_caption(“painter”)
self.clock = pygame.time.clock()
def run(self):
self.screen.fill((255, 255, 255))
while true:
# max fps limit
self.clock.tick(30)
for event in pygame.event.get():
if event.type == quit:
return
elif event.type == keydown:
pass
elif event.type == mousebuttondown:
pass
elif event.type == mousemotion:
pass
elif event.type == mousebuttonup:
pass
pygame.display.update()
if __name__ == ‘__main__’:
app = painter()
app.run()
这个非常简单,准备好画板类,画笔类,暂时还都是空的,其实也就是做了一些pygame的初始化工作。如果这样还不能读懂的话,您需要把前面22篇从头再看看,有几句话不懂就看几遍:)
这里只有一点要注意一下,我们把帧率控制在了30,没有人希望在画画的时候,cpu风扇狂转的。而且只是画板,没有自动运动的物体,纯粹的交互驱动,我们也不需要很高的刷新率。
第一次的绘图代码
按住鼠标然后在上面移动就画东西,我们很容易可以想到这个流程:
按下左键 → 绘制flag开
移动鼠标 → flag开的时候,在移动坐标上留下痕迹
放开左键 → 绘制flag关
按下左键 → 绘制flag开
移动鼠标 → flag开的时候,在移动坐标上留下痕迹
放开左键 → 绘制flag关
立刻试一试吧:
class brush():
def __init__(self, screen):
self.screen = screen
self.color = (0, 0, 0)
self.size = 1
self.drawing = false
def start_draw(self):
self.drawing = true
def end_draw(self):
self.drawing = false
def draw(self, pos):
if self.drawing:
pygame.draw.circle(self.screen, self.color, pos, self.size)
class painter():
def __init__(self):
#*#*#*#*#
self.brush = brush(self.screen)
def run(self):
#*#*#*#*#
elif event.type == keydown:
# press esc to clear screen
if event.key == k_escape:
self.screen.fill((255, 255, 255))
elif event.type == mousebuttondown:
self.brush.start_draw()
elif event.type == mousemotion:
self.brush.draw(event.pos)
elif event.type == mousebuttonup:
self.brush.end_draw()
框架中有的代码我就不贴了,用#*#*#*#*#代替,最后会给出完整代码的。
这里主要是给brush类增加了一些功能,也就是上面我们提到的流程想对应的功能。留下痕迹,我们是使用了在坐标上画圆的方法,这也是最容易想到的方法。这样的效果好不好呢?我们试一试:

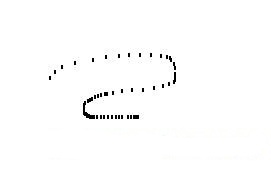
哦,太糟糕了,再劣质的铅笔也不会留下这样断断续续的笔迹。上面是当我们鼠标移动的快一些的时候,点之间的间距很大;下面是移动慢一些的时候,勉勉强强显得比较连续。从这里我们也可以看到pygame事件响应的频度(这个距离和上面设置的最大帧率有关)。
怎么办?要修改帧率让pygame平滑的反应么?不,那样做得不偿失,换一个角度思考,如果有间隙,我们让pygame把这个间隙连接起来不好么?
第二次的绘图代码
思路还是很简单,当移动的时候,brush在上一次和这一次的点之间连一条线就好了:
class brush():
def __init__(self, screen):
self.screen = screen
self.color = (0, 0, 0)
self.size = 1
self.drawing = false
self.last_pos = none # 50: size = 50
print “* set brush size to”, size
self.size = size
self.brush_now = self.brush.subsurface((0,0), (size*2, size*2))
def get_size(self):
return self.size
def draw(self, pos):
if self.drawing:
for p in self._get_points(pos):
# draw eveypoint between them
if self.style == false:
pygame.draw.circle(self.screen,
self.color, p, self.size)
else:
self.screen.blit(self.brush_now, p)
self.last_pos = pos
def _get_points(self, pos):
“”” get all points between last_point ~ now_point. “””
points = [ (self.last_pos[0], self.last_pos[1]) ]
len_x = pos[0] – self.last_pos[0]
len_y = pos[1] – self.last_pos[1]
length = math.sqrt(len_x ** 2 + len_y ** 2)
step_x = len_x / length
step_y = len_y / length
for i in xrange(int(length)):
points.append(
(points[-1][0] + step_x, points[-1][1] + step_y))
points = map(lambda x:(int(0.5+x[0]), int(0.5+x[1])), points)
# return light-weight, uniq list
return list(set(points))
我们增加了几个方法,_get_points()返回上一个点到现在点之间所有的点(这话听着真别扭),draw根据这些点填充。
同时我们把get_size()、set_size()也加上了,用来设定当前笔刷的大小。
而变化最大的,则是set_style()和get_style(),我们现在载入一个png图片作为笔刷的样式,当style==true的时候,draw不再使用circle填充,而是使用这个png样式,当然,这个样式大小也是应该可调的,所有我们在set_size()中,会根据size大小实时的调整png笔刷。
当然,我们得在主循环中调用set方法,才能让这些东西工作起来~ 过一会儿再讲。再回顾下我们的样式,还有什么?颜色……我们马上把颜色设置代码也加进去吧,太简单了!我这里就先偷偷懒了~
控制代码
到现在,我们已经完成了绘图部分的所有功能了。现在已经可以在屏幕上自由发挥了,但是笔刷的颜色和大小好像不能改啊……我们有这样的接口你却不调用,浪费了。
趁热打铁赶快把我们这个画板完成吧~
